> For the complete documentation index, see [llms.txt](https://navixy.com/docs/llms.txt). Markdown versions of documentation pages are available by appending `.md` to page URLs; this page is available as [Markdown](https://navixy.com/docs/user/fr/guide/x-gps-mobile-apps/x-gps-monitor/quick-start.md).
# Démarrage rapide
Téléchargez X-GPS Monitor depuis Google Play ou l'App Store, puis connectez-vous avec vos identifiants Navixy pour commencer à surveiller votre flotte sur mobile.
{% columns %}
{% column %}
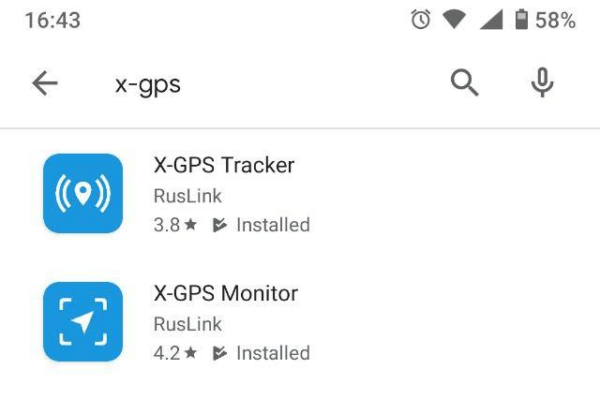
Vous pouvez télécharger l’application gratuitement sur Google Play ou l’App Store.
Accédez à la boutique et saisissez X-GPS dans le champ de recherche.
Sélectionnez **X-GPS Monitor** et cliquez sur « Installer ».
{% endcolumn %}
{% column %}
{% endcolumn %}
{% endcolumns %}
### Se connecter
{% columns %}
{% column %}
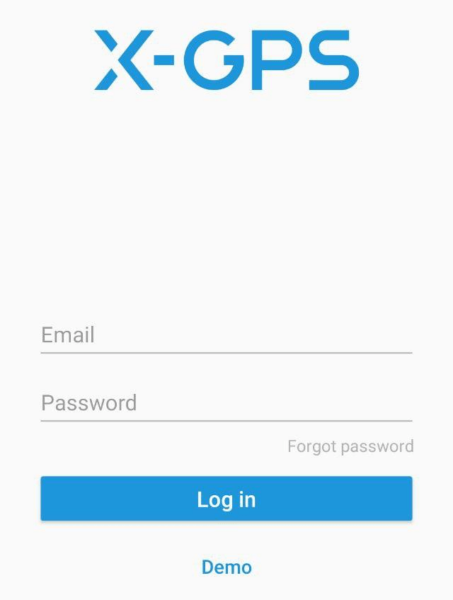
Au premier lancement, l’application vous proposera de scanner un code QR. Pour obtenir le code QR, cliquez sur le  bouton sous la plateforme Navixy [formulaire de connexion](https://tracking.navixy.com/).
Après avoir scanné le code QR, saisissez votre nom d’utilisateur et votre mot de passe, puis cliquez sur le **Se connecter** bouton.
Si vous avez oublié votre mot de passe, cliquez sur le bouton correspondant, saisissez votre adresse e-mail et le captcha. Ensuite, vous recevrez un e-mail contenant un lien pour réinitialiser votre mot de passe.
Après une connexion réussie, vous verrez l’écran de la carte.
{% endcolumn %}
{% column %}
{% endcolumn %}
{% endcolumns %}
### Outils principaux
{% columns %}
{% column %}
Les éléments suivants sont disponibles sur l’écran principal :
1. **Barre latérale.** L’appui sur un bouton affiche un menu dans lequel vous pouvez accéder aux informations sur l’utilisateur, le solde, la liste des appareils et d’autres commandes.
2. **Afficher les traceurs.** Cliquez pour sélectionner les traceurs à afficher : tous, un seul ou un groupe. Vous pouvez également activer **Suivre le traceur**, et la carte se centrera automatiquement sur un appareil.
3. **Type de carte.** Vous permet de sélectionner parmi la liste des cartes disponibles et d’activer l’affichage du trafic.
4. **Liste des notifications.** Affiche toutes les notifications non lues.
5. **Afficher la localisation.** Centre la carte sur votre position actuelle.
6. **Échelle.** Vous pouvez modifier l’échelle de la carte à l’aide des boutons « + » et « - ».
{% endcolumn %}
{% column %}

{% endcolumn %}
{% endcolumns %}
---
# Agent Instructions
This documentation is published with GitBook. GitBook is the documentation platform designed so that both humans and AI agents can read, navigate, and reason over technical content effectively. Learn more at gitbook.com.
## Querying This Documentation
If you need additional information that is not directly available in this page, you can query the documentation by asking a question.
Perform an HTTP GET request on the following URL with the `ask` and `goal` query parameters:
```
GET https://navixy.com/docs/user/fr/guide/x-gps-mobile-apps/x-gps-monitor/quick-start.md?ask=&goal=
```
`ask` is the immediate question: it should be specific, self-contained, and written in natural language.
`goal` is what the user is ultimately trying to achieve, the reason they need the answer. Sharing it helps GitBook give you a better, more relevant answer. A goal is most helpful when it describes the outcome the user wants rather than restating the question. For example, with `ask=how do I create an API token`, a goal like `automate deployments from our CI pipeline` lets GitBook tailor the answer to that use case.
The response will contain a direct answer to the question and relevant excerpts and sources from the documentation.
Use this mechanism when the answer is not explicitly present in the current page, you need clarification or additional context, or you want to retrieve related documentation sections.
bouton sous la plateforme Navixy [formulaire de connexion](https://tracking.navixy.com/).
Après avoir scanné le code QR, saisissez votre nom d’utilisateur et votre mot de passe, puis cliquez sur le **Se connecter** bouton.
Si vous avez oublié votre mot de passe, cliquez sur le bouton correspondant, saisissez votre adresse e-mail et le captcha. Ensuite, vous recevrez un e-mail contenant un lien pour réinitialiser votre mot de passe.
Après une connexion réussie, vous verrez l’écran de la carte.
{% endcolumn %}
{% column %}

{% endcolumn %}
{% endcolumns %}
### Outils principaux
{% columns %}
{% column %}
Les éléments suivants sont disponibles sur l’écran principal :
1. **Barre latérale.** L’appui sur un bouton affiche un menu dans lequel vous pouvez accéder aux informations sur l’utilisateur, le solde, la liste des appareils et d’autres commandes.
2. **Afficher les traceurs.** Cliquez pour sélectionner les traceurs à afficher : tous, un seul ou un groupe. Vous pouvez également activer **Suivre le traceur**, et la carte se centrera automatiquement sur un appareil.
3. **Type de carte.** Vous permet de sélectionner parmi la liste des cartes disponibles et d’activer l’affichage du trafic.
4. **Liste des notifications.** Affiche toutes les notifications non lues.
5. **Afficher la localisation.** Centre la carte sur votre position actuelle.
6. **Échelle.** Vous pouvez modifier l’échelle de la carte à l’aide des boutons « + » et « - ».
{% endcolumn %}
{% column %}

{% endcolumn %}
{% endcolumns %}
---
# Agent Instructions
This documentation is published with GitBook. GitBook is the documentation platform designed so that both humans and AI agents can read, navigate, and reason over technical content effectively. Learn more at gitbook.com.
## Querying This Documentation
If you need additional information that is not directly available in this page, you can query the documentation by asking a question.
Perform an HTTP GET request on the following URL with the `ask` and `goal` query parameters:
```
GET https://navixy.com/docs/user/fr/guide/x-gps-mobile-apps/x-gps-monitor/quick-start.md?ask=&goal=
```
`ask` is the immediate question: it should be specific, self-contained, and written in natural language.
`goal` is what the user is ultimately trying to achieve, the reason they need the answer. Sharing it helps GitBook give you a better, more relevant answer. A goal is most helpful when it describes the outcome the user wants rather than restating the question. For example, with `ask=how do I create an API token`, a goal like `automate deployments from our CI pipeline` lets GitBook tailor the answer to that use case.
The response will contain a direct answer to the question and relevant excerpts and sources from the documentation.
Use this mechanism when the answer is not explicitly present in the current page, you need clarification or additional context, or you want to retrieve related documentation sections.