> For the complete documentation index, see [llms.txt](https://navixy.com/docs/llms.txt). Markdown versions of documentation pages are available by appending `.md` to page URLs; this page is available as [Markdown](https://navixy.com/docs/user/guide/account/iot-logic/nodes/action-node.md).
# Device action
Use Device action nodes in IoT Logic to send automated commands to GPS devices, such as switching outputs or sending GPRS commands when triggered by data flows.
## Technical overview and capabilities
{% columns %}
{% column width="58.333333333333336%" %}
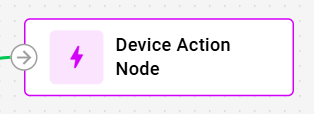
**Device action** nodes in IoT Logic enable automated device control by executing specific commands when triggered by incoming data flows. These nodes transform passive fleet monitoring into active automation systems, performing critical operations like output switching and GPRS command transmission.
{% endcolumn %}
{% column width="50%" %}
{% endcolumn %}
{% endcolumns %}
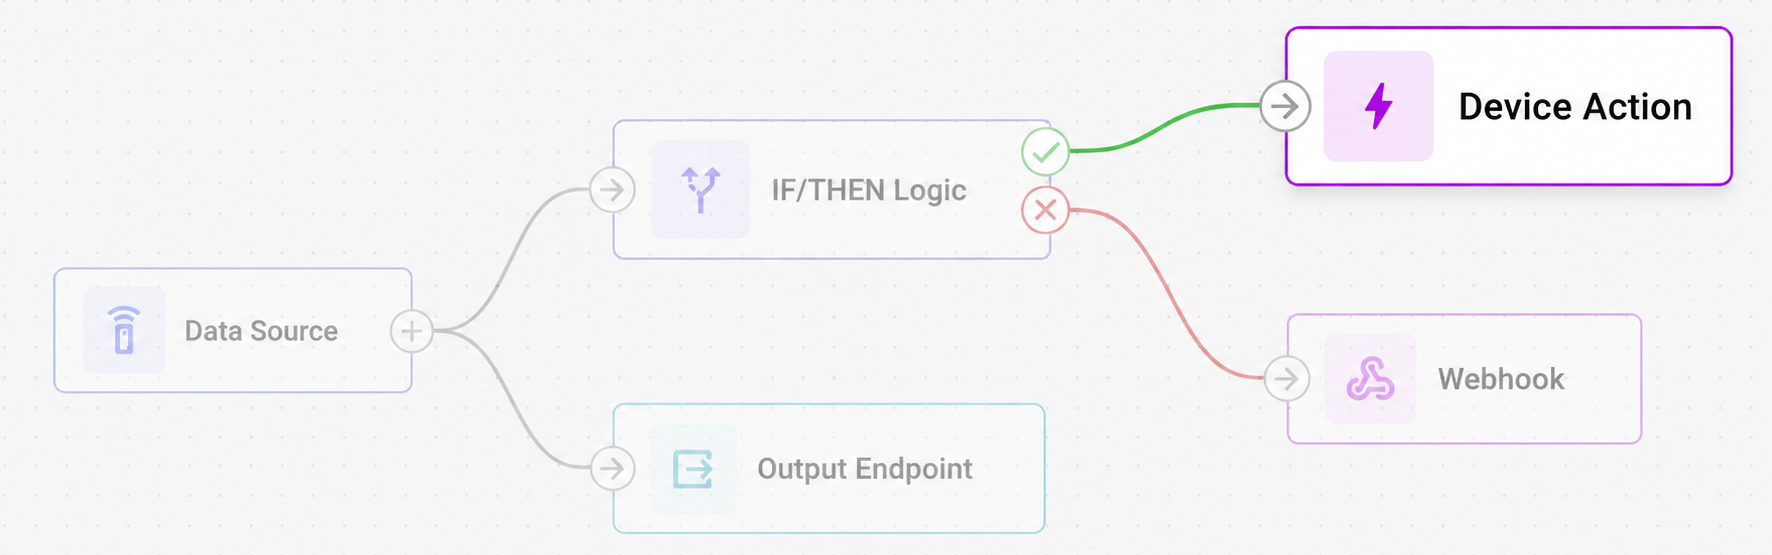
While Device action nodes can receive data from any node type, they are most commonly connected to [IF/THEN Logic](/docs/user/guide/account/iot-logic/nodes/logic-node.md) nodes that evaluate conditions and trigger actions only when specific criteria are met, such as temperature thresholds, unauthorized movement, or harsh driving incidents.
{% hint style="info" %}
The **Device action** nodes are configured separately for each flow in the Navixy platform UI. Each node can contain multiple actions that execute sequentially when triggered by incoming data.
{% endhint %}
### How Device action nodes work
When data reaches a **Device action** node, the system identifies which devices provided the incoming data and executes the configured actions for those devices only. For full details on execution sequence and targeting, see [Action execution and targeting](#action-execution-and-targeting) below.
{% hint style="info" %}
**Device connectivity requirement**: Actions are sent only to devices that are confirmed online (those providing recent data), ensuring reliable command delivery.
{% endhint %}
Each **Device action** node's trigger result appears in [Data Stream Analyzer](/docs/user/guide/account/iot-logic/data-stream-analyzer.md) as an attribute named after the node's **Node ID** (shown in the node's configuration dialog, for example `action_1a2b3c4d`). The value is `0` when the node hasn't been triggered and `1` when it has, letting you confirm execution and tell multiple Device action nodes apart in the same flow.
### Flow architecture integration
**Device action** nodes function as terminal nodes within the flow architecture, receiving triggers from upstream nodes without passing data forward. The automation capabilities integrate with Navixy's broader device management system through:
* **Conditional automation**: Integration with [IF/THEN Logic](/docs/user/guide/account/iot-logic/nodes/logic-node.md) nodes enables sophisticated IF-THEN workflows where actions execute only when specific conditions are validated
* **Real-time device control**: Commands are transmitted within seconds of receiving triggers, ensuring immediate response to critical conditions
* **Fleet-wide coordination**: When connected to multiple device sources, actions can coordinate responses across entire vehicle groups simultaneously
* **Device capability respect**: Individual device limitations are honored, with unsupported commands being received but not executed
## Configuration options
{% columns %}
{% column valign="middle" %}
Configuring a **Device action** node determines what commands execute and, optionally, which additional devices receive those same commands.
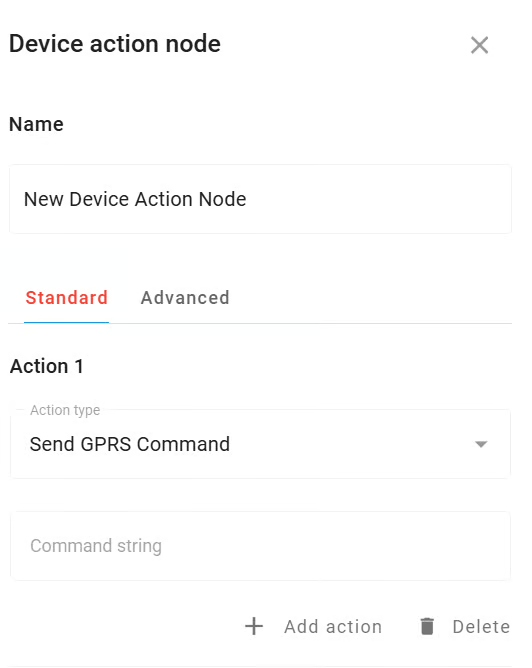
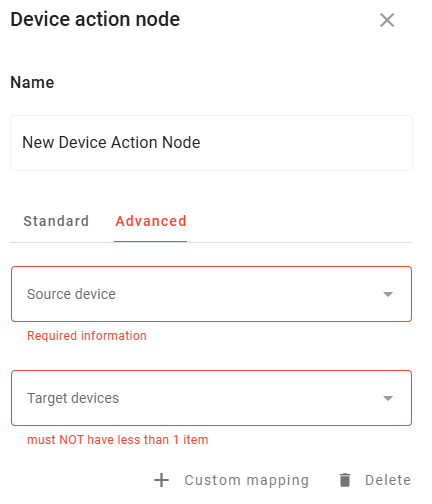
The configuration dialog is organized into two tabs:
* **Standard**: defines what commands to execute. Works independently, with no dependency on the Advanced tab.
* **Advanced**: defines which additional devices receive the same commands when the node is triggered. Optional.
{% endcolumn %}
{% column %}
{% endcolumn %}
{% endcolumns %}
Let's see what elements this node uses and what you can configure when working with it:
### Configuration steps
{% stepper %}
{% step %}
#### Specify node Name
Enter a descriptive name that identifies the automated actions this node will perform
1. Use names like "Emergency Cooling Response" or "Security Alert Actions" for clarity
2. This name appears in the flow diagram for easy identification
{% endstep %}
{% step %}
#### Node ID (automatically generated)
Below the Name field, the dialog displays a **Node ID** (for example, `action_1a2b3c4d`). This field is read-only — you can't edit or set its value.
1. The ID is generated automatically when the node is created and stays the same for the life of the node
2. Use it to tell this node's results apart from other Device action nodes in [Data Stream Analyzer](/docs/user/guide/account/iot-logic/data-stream-analyzer.md), where it appears as an attribute showing `0` (not triggered) or `1` (triggered)
{% endstep %}
{% step %}
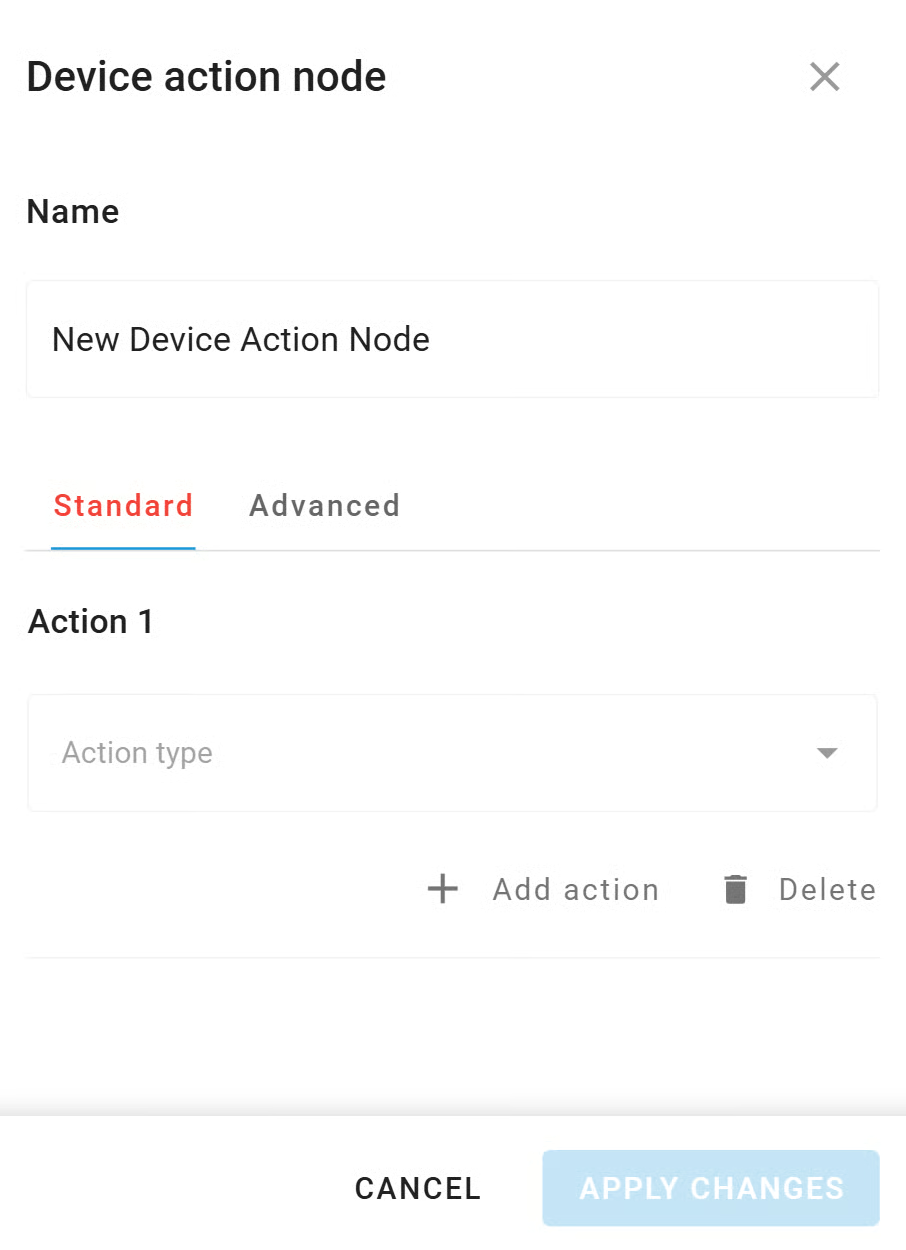
#### Select Action type
In the **Standard** tab, choose the type of automated response from the dropdown menu
1. **Switch Output**: Control device outputs by switching them on or off
2. **Send GPRS Command**: Transmit custom commands directly to devices
{% endstep %}
{% step %}
#### Configure action parameters
Set up the specific details based on your selected action type:
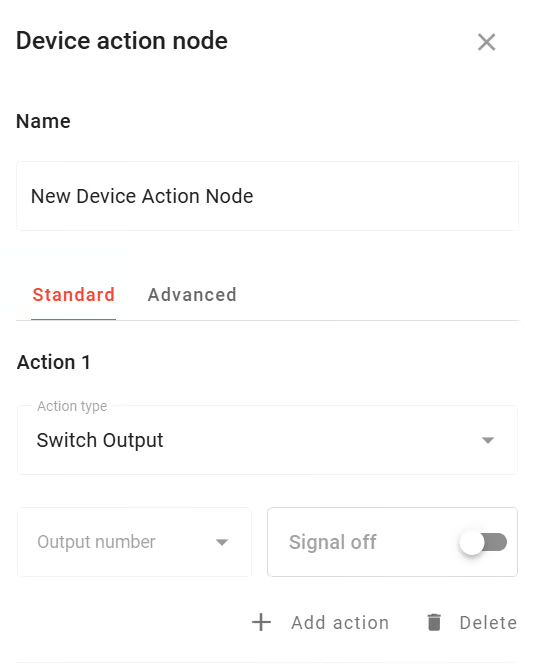
Switch Output configuration
When configuring Switch Output actions:
* **Output number**: Select which device output to control from the dropdown menu
* Available output numbers depend on your specific device capabilities
* Refer to your device documentation to understand output functions
* **On/Off toggle**: Set whether the action switches the output ON or OFF
* Use the toggle switch to select the desired state
Send GPRS Command configuration
When configuring GPRS Command actions:
* **Command string**: Enter the exact command text to send to devices
* Commands must match your device's supported command syntax
* Consult device documentation for available commands and proper formatting
* There are no character restrictions in the input field
{% endstep %}
{% step %}
#### Add additional actions (optional)
Click **Add action** to create multiple actions within the same node.
{% hint style="info" %}
* Action commands are sent upon receiving a data package from the device according to the flow configuration
* Commands execute sequentially in the order they appear in the configuration
* Each action can be a different type (Switch Output or GPRS Command)
* Use the bin icon to remove unnecessary actions
{% endhint %}
{% endstep %}
{% step %}
#### Configure recipient mappings (optional)
Open the **Advanced** tab to define which additional devices receive the same commands when the node is triggered.
1. Use the **Source device** dropdown to select the device whose incoming data triggers the node. This must be a device present in the flow's **Data Source node**.
2. Use the **Target devices** dropdown to select one or more devices that will receive the same commands.
3. Click **+ Custom mapping** to add additional source-to-target pairs if different source devices should propagate commands to different sets of target devices.
{% hint style="info" %}
The Advanced tab is optional. Without it, the node behaves exactly as before — commands execute only for the triggering device.
{% endhint %}
{% endstep %}
{% step %}
#### Save configuration
Click **Apply changes** to save your node configuration
{% endstep %}
{% endstepper %}
{% hint style="danger" %}
**Device compatibility note:** Action execution depends on individual device capabilities. Ensure your devices support the specific outputs or commands you're configuring. Look for supported commands in manufacturer resources like device documentation. List of supported devices is available at [Navixy integrated devices](https://www.navixy.com/devices/).
{% endhint %}
## Action execution and targeting
The **Device action** node provides precise control over when and where commands are executed, ensuring efficient and targeted automation responses.
### Execution sequence
When triggered, the **Device action** node follows this execution pattern:
1. **Device targeting**: Actions are sent only to devices that provided data in the current trigger event
1. This ensures commands reach only the specific devices involved in the condition
2. Prevents unnecessary commands to unaffected devices in the fleet
2. **Sequential processing**: Multiple actions within a node execute in the configured order from top to bottom
1. Each action completes transmission before the next action begins
2. Total execution time is typically within seconds of receiving the trigger
3. **Device validation**: Individual devices process received commands according to their capabilities
1. Supported commands execute immediately upon receipt
2. Unsupported commands are received but ignored by the device
3. Device safety mechanisms may prevent inappropriate commands (e.g., engine shutdown while moving)
### Connection behavior
**IF/THEN Logic node integration**: When connected to [IF/THEN Logic](/docs/user/guide/account/iot-logic/nodes/logic-node.md) nodes, actions execute only for devices where the logical condition evaluated to `true`. This provides precise conditional automation.
**Direct connections**: When connected directly to other node types (Data Source, Initiate Attribute), actions execute for all devices in the data stream each time data is received.
## Frequently asked questions
#### How do I know if my actions were executed successfully?
Check [Data Stream Analyzer](/docs/user/guide/account/iot-logic/data-stream-analyzer.md): select the triggering device and look for the attribute matching this node's Node ID. See [How Device action nodes work](#how-device-action-nodes-work) for details.
Commands are sent to devices that are confirmed online (those providing recent data), with no execution time gap between trigger and delivery. This eliminates the possibility of the device going offline between trigger and execution.
#### Can I connect multiple nodes to the same Device action node?
Yes. Device action nodes can receive triggers from multiple upstream nodes, but be aware that actions will execute for any device that triggers any connected node. When designing complex flows, consider the cumulative effect of multiple trigger sources to ensure actions execute only for intended scenarios. To confirm the node fires only in the scenarios you intend, watch its Node ID attribute in [Data Stream Analyzer](/docs/user/guide/account/iot-logic/data-stream-analyzer.md): it shows `1` on each trigger and `0` otherwise.
#### What happens if I connect a Device action node directly to a Data Source?
The Device action node will execute its configured actions every time any device in the Data Source sends data. This creates continuous action execution rather than conditional responses. For most use cases, connecting Device action nodes to [IF/THEN Logic](/docs/user/guide/account/iot-logic/nodes/logic-node.md) nodes provides better control over when actions should execute.
---
# Agent Instructions
This documentation is published with GitBook. GitBook is the documentation platform designed so that both humans and AI agents can read, navigate, and reason over technical content effectively. Learn more at gitbook.com.
## Querying This Documentation
If you need additional information that is not directly available in this page, you can query the documentation by asking a question.
Perform an HTTP GET request on the following URL with the `ask` and `goal` query parameters:
```
GET https://navixy.com/docs/user/guide/account/iot-logic/nodes/action-node.md?ask=&goal=
```
`ask` is the immediate question: it should be specific, self-contained, and written in natural language.
`goal` is what the user is ultimately trying to achieve, the reason they need the answer. Sharing it helps GitBook give you a better, more relevant answer. A goal is most helpful when it describes the outcome the user wants rather than restating the question. For example, with `ask=how do I create an API token`, a goal like `automate deployments from our CI pipeline` lets GitBook tailor the answer to that use case.
The response will contain a direct answer to the question and relevant excerpts and sources from the documentation.
Use this mechanism when the answer is not explicitly present in the current page, you need clarification or additional context, or you want to retrieve related documentation sections.